If this is an SU device(has an SU tag) you can only connect to SU network printers or personal printers connected via USB or Bluetooth. You cannot connect to a wireless printer while on campus or when using our Always-On VPN.
If this is a personal device, you cannot connect to a wireless printer while on campus.
Connected by USB
On your Mac, update your software: Choose Apple menu > System Preferences, click Software Update, then install any software updates listed. Even if no updates appear, this ensures that macOS has the latest information about printer software it can download from Apple. If you don’t do this, you may see a message that software isn’t available when you connect your printer.
Prepare your printer: Use the instructions that came with your printer to unpack the printer, install ink or toner, and add paper. Turn on the printer and make sure it’s not displaying any errors.
Connect your printer: Connect the USB cable to your Mac. If you see a message prompting you to download new software, make sure to download and install it.
Important: If your Mac has a single USB-C port, use a multiport adapter. Connect the printer, then connect a USB-C cable to a power supply to prolong the battery life of your Mac.
Connected via Bluetooth
On your Mac, update your software: Choose Apple menu > System Preferences, click Software Update, then install any software updates listed. Even if no updates appear, this ensures that macOS has the latest information about printer software it can download from Apple. If you don’t do this, you may see a message that software isn’t available when you connect your printer.
Prepare your printer: Use the instructions that came with your printer to unpack the printer, install ink or toner, and add paper. Turn on the printer and make sure it’s not displaying any errors.
Connect your printer: Follow the instructions that came with your printer to make sure it’s ready to connect with Bluetooth.
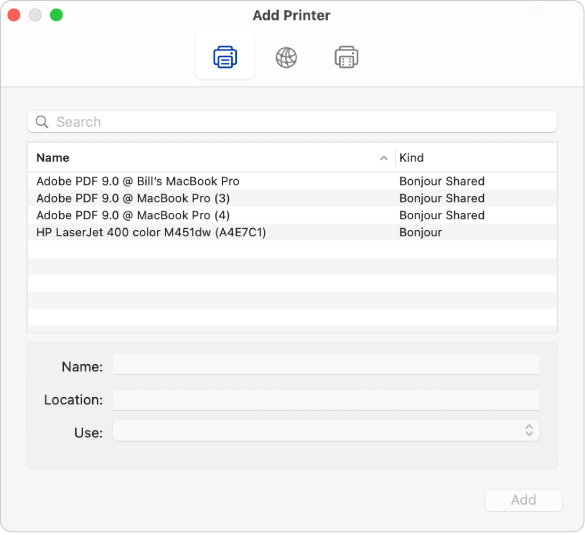
Add your Bluetooth printer to your printer list: Choose Apple menu > System Preferences, then click Printers & Scanners. Click the Add button , then click the Default button .
Select the printer in the Printers list, then click Add. If the printer you expect to see is not in the list, enter its name in the search field, and press Return.
If your printer doesn’t appear in the list, make sure you have the latest Bluetooth driver for the printer installed. Check with the manufacturer for the latest driver.
After you connect your printer, if you see a message prompting you to download new software, make sure to download and install it.
